Tutorial: The Cordelia DRESS

We’re gearing up for Valentine’s Day here at My Little Plumcake, and we’re going to help you get ready, too!  Our pattern of the month is the Cordelia Peplum top, so that’s the pattern we’re working with today.  We want very dearly for you to “Be Mine” so we’ve put together a tutorial, tied it onto one of cupid’s arrows and aimed it at you. Here’s the Cordelia DRESS tutorial! YAY!  We hope you’ll be our sweetheart (because of the neckline…get it?)

???????????????????????????????

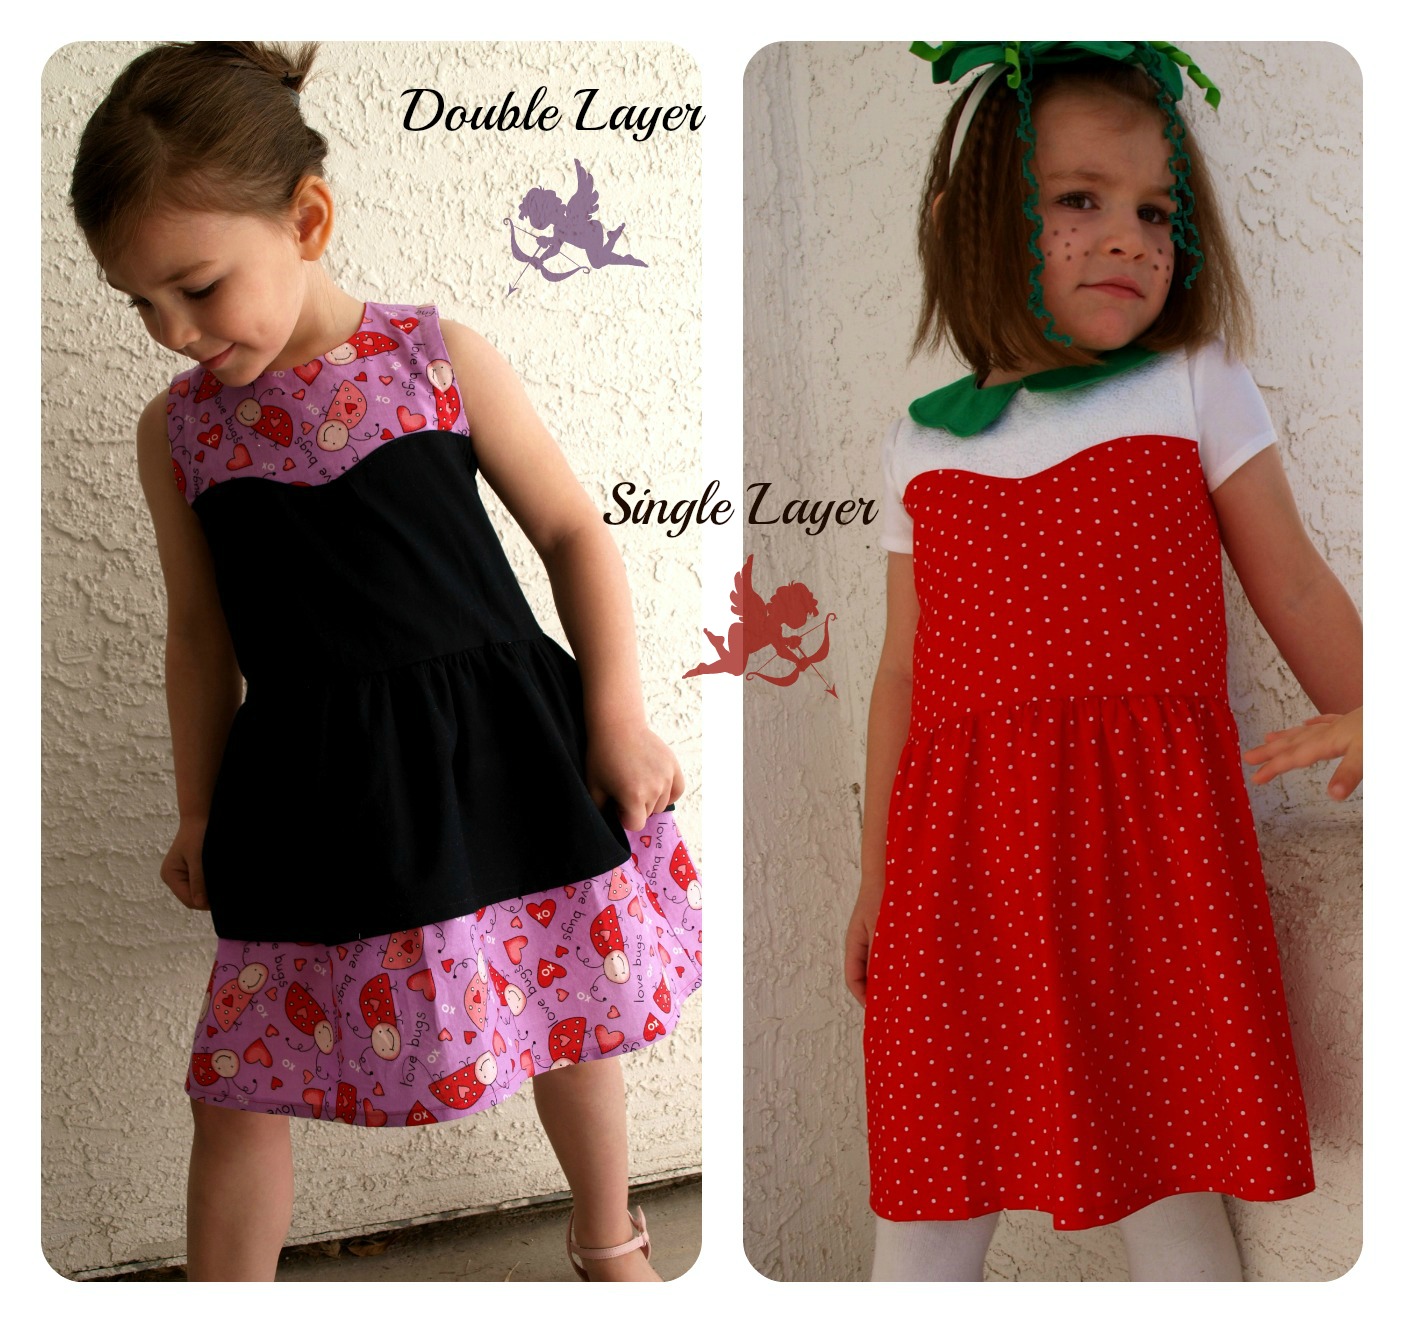
We’re offering 2 different versions for you…a double and single layer skirt.  Pick the one that has your heart and get ready to sew!

Cordelia Dress3

The first step in this process is to make the bodice just like the instructions say to.

Once you’re finished, try the bodice on your little one and measure from the bottom of the bodice to where you want the dress length to be.  Now take that number, add in a hem allowance of ½” and a seam allowance (for where the skirt attaches to the bodice) of 3/8” to the  length.

My model was being horrible and I couldn’t get good shots

Cordelia Dress7

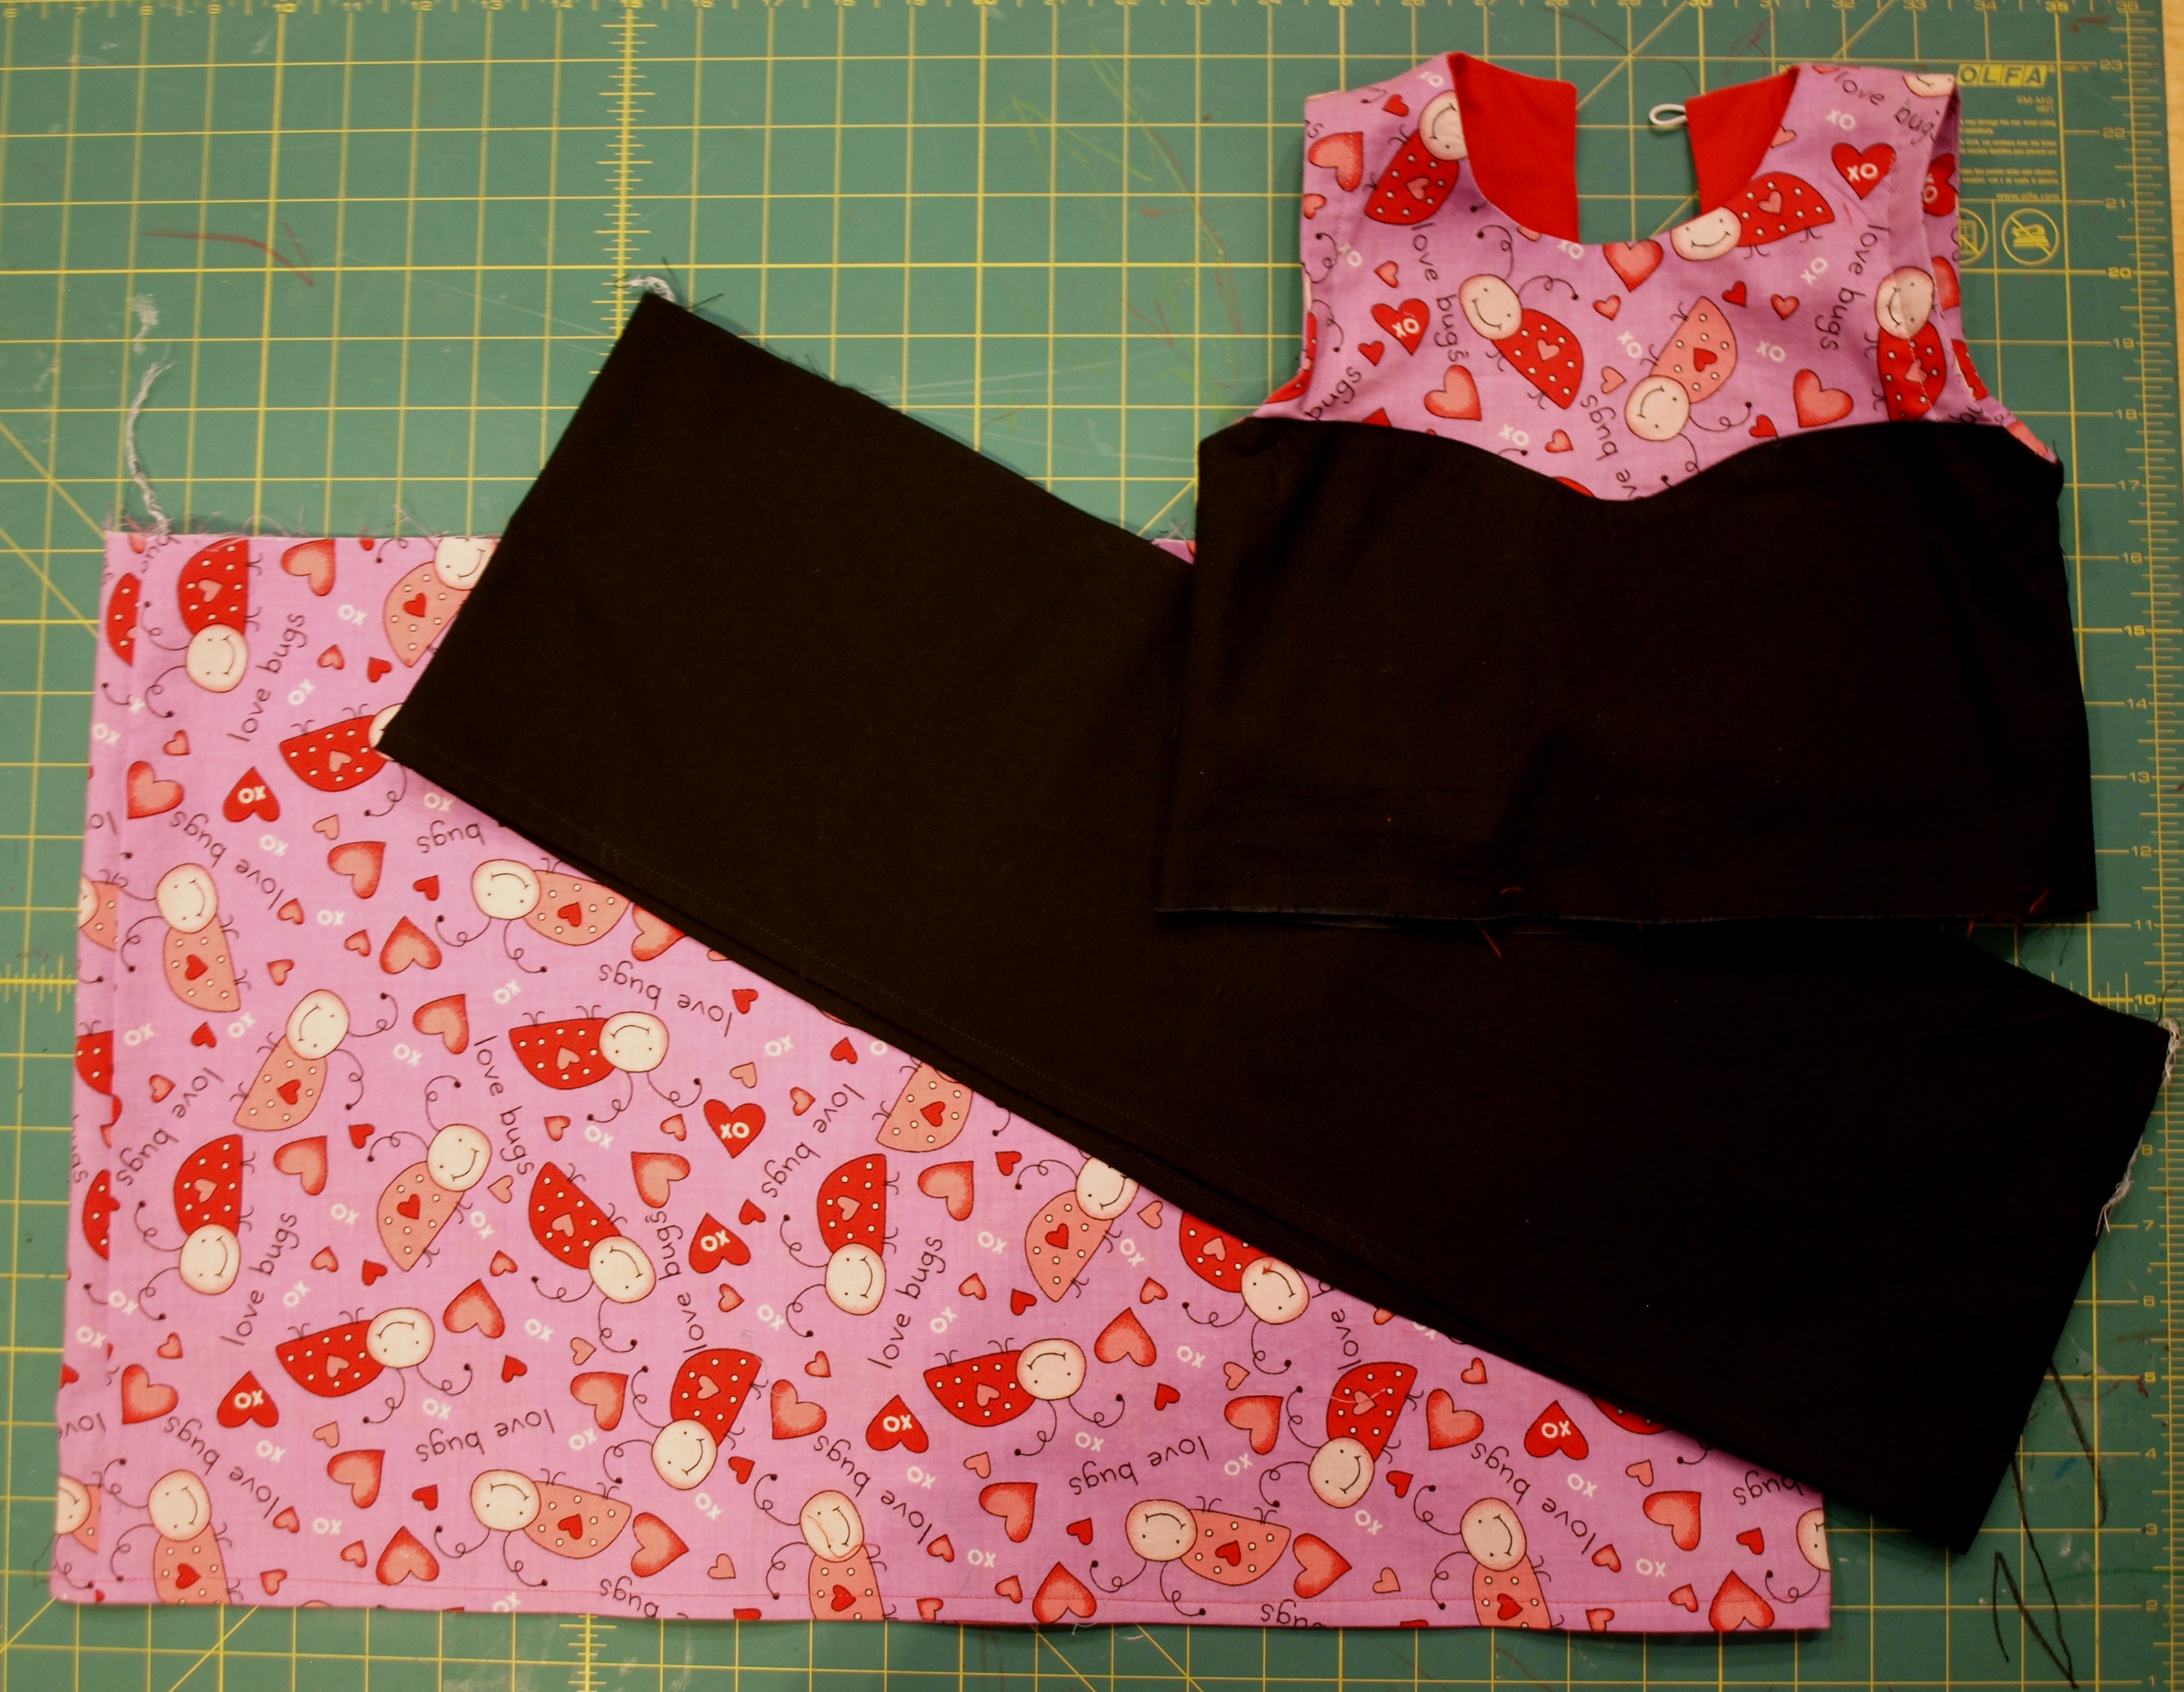
So lets use this model…

f16710a564ab0e9f3f59278693554665

FOR DOUBLE LAYER: This is where we break off into the 2 variations.  If you are doing the double layer dress, cut out your peplum skirt pieces before moving on to the next step. For a single layer, you will NOT need to cut out  these peplum pieces.

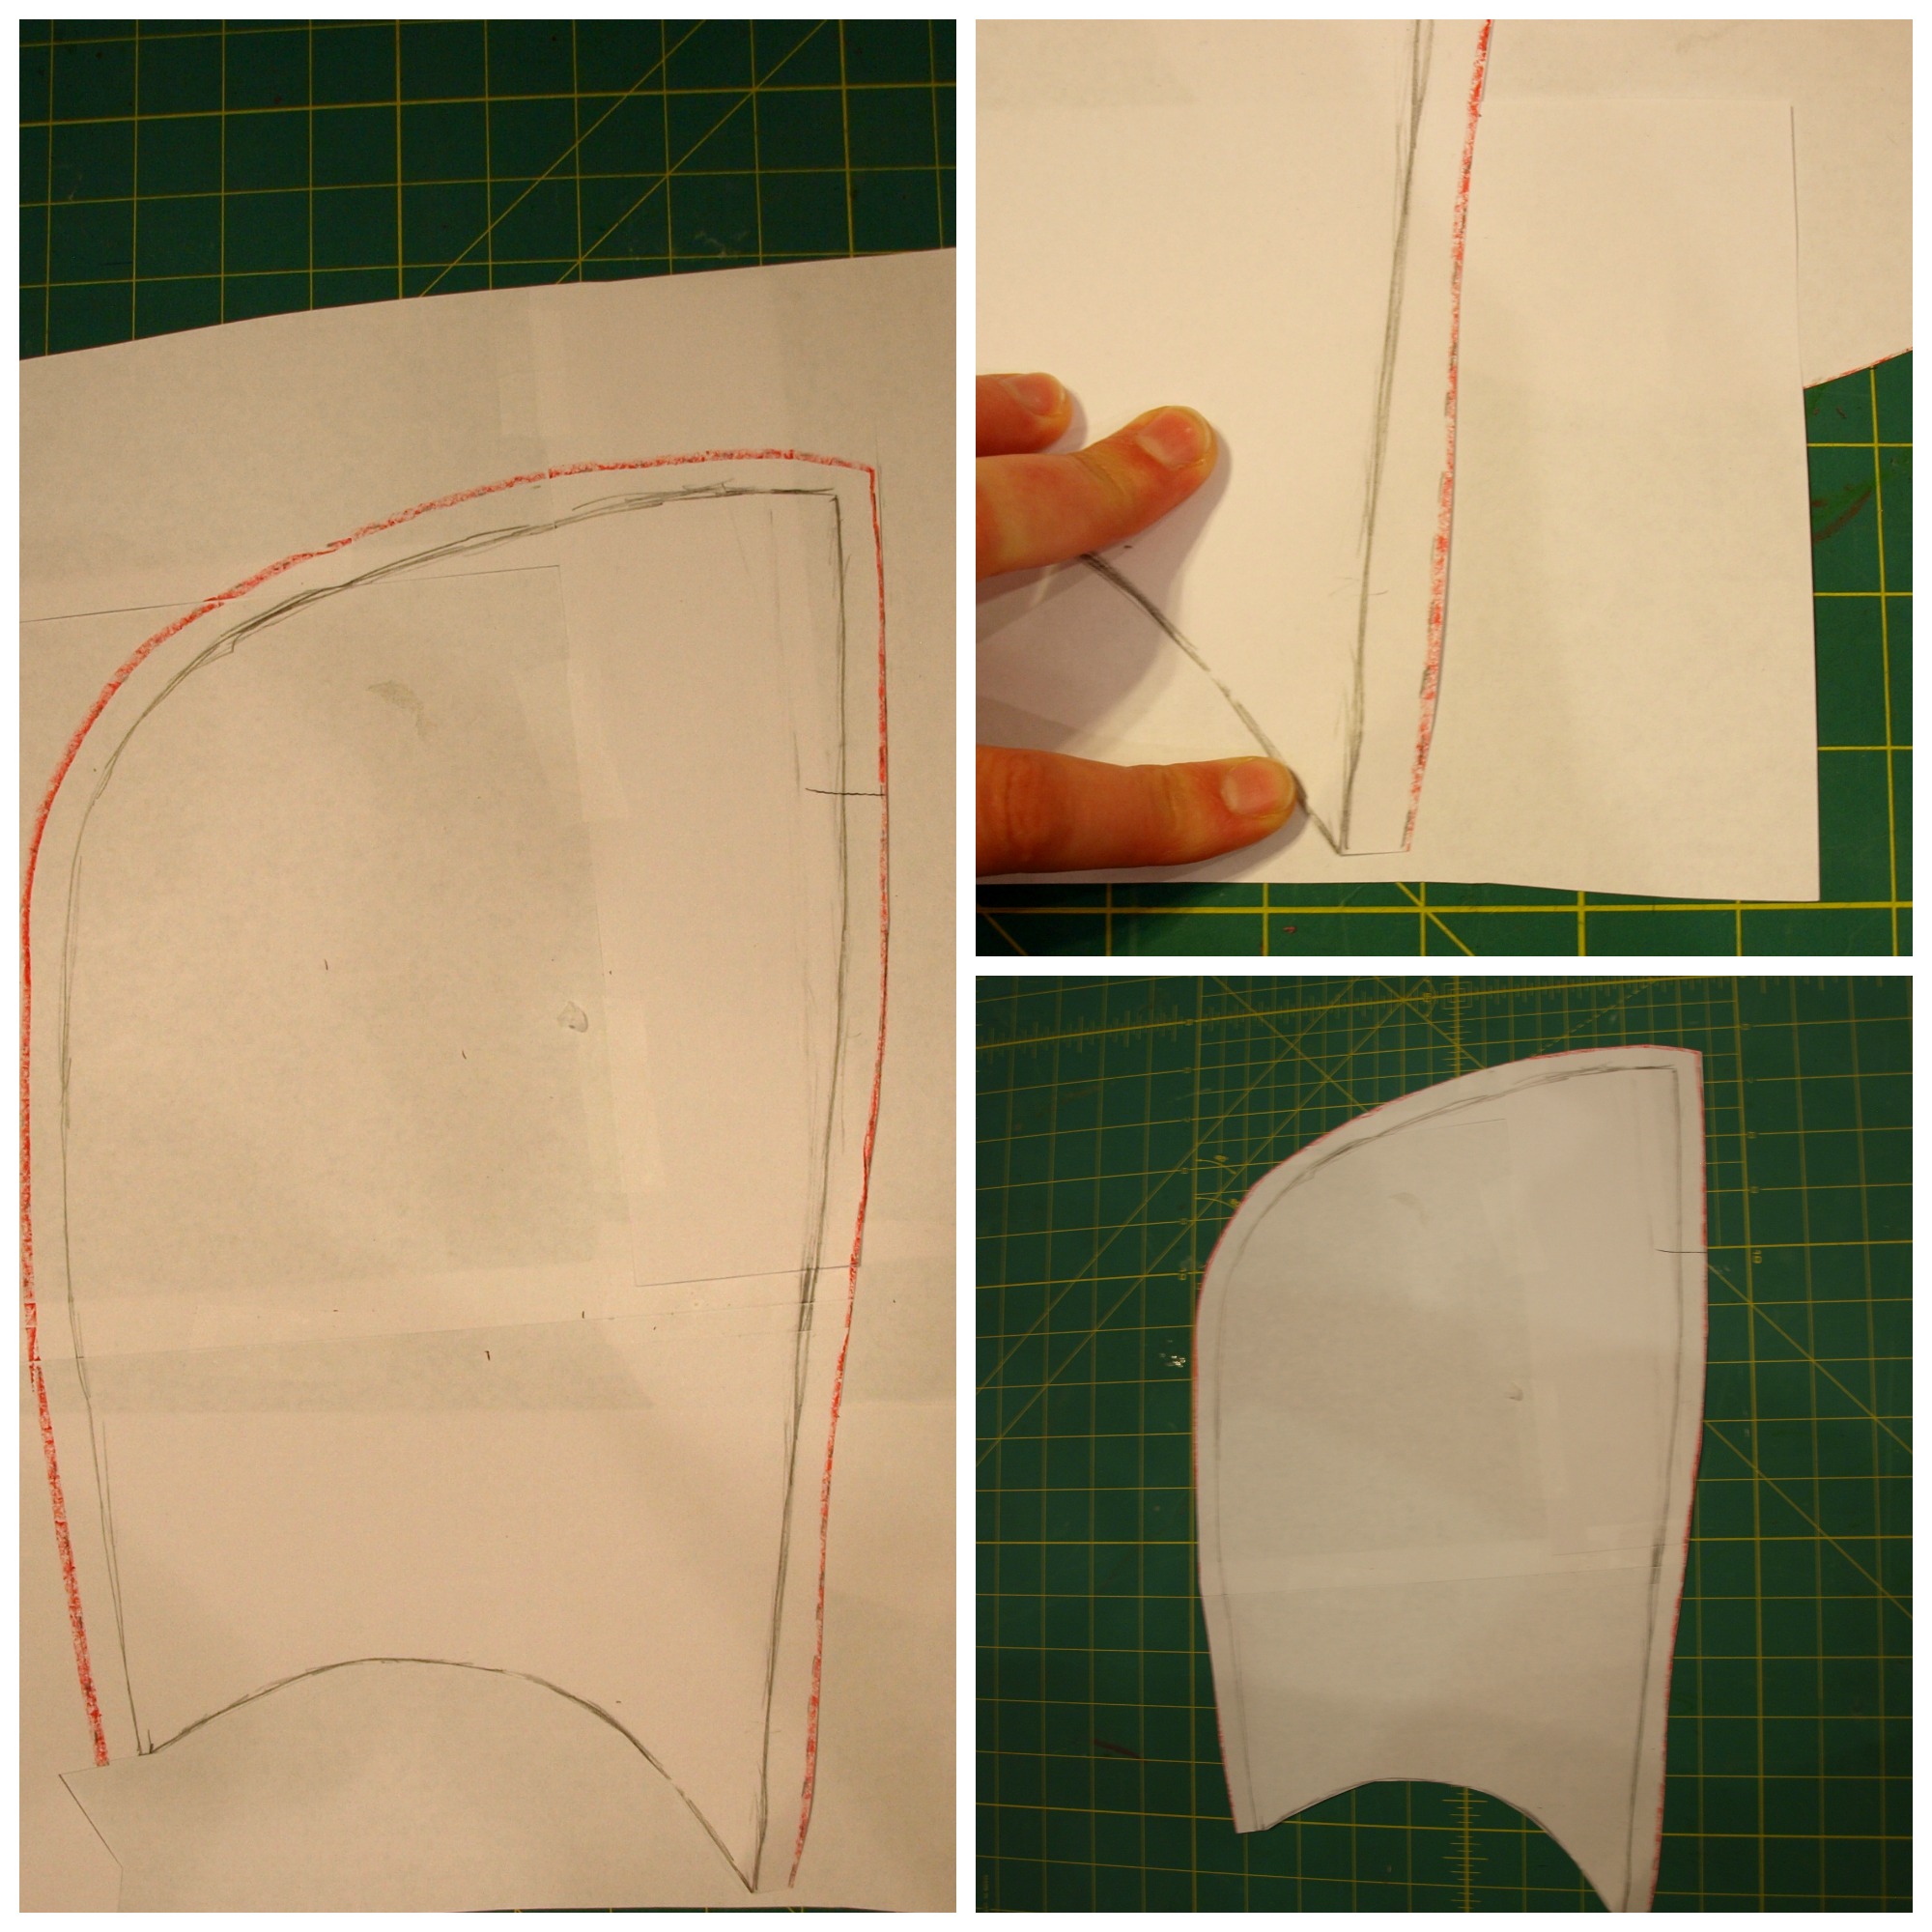
Take your peplum pattern piece and extend the pattern by adding paper to the bottom.  Starting from the top corner of your pattern piece, line up your ruler flush with the top and measure your full dress-length. Draw a line straight down and another across. Cut out your new skirt pattern. Woo hoo!  Now, go ahead and cut out those skirt pieces.

Cordelia Dress8

For SINGLE layer: You should have 2 long skirt pieces and a completed bodice

For DOUBLE Layer: You should have 2 peplum, 2 skirt pieces and a completed bodice.

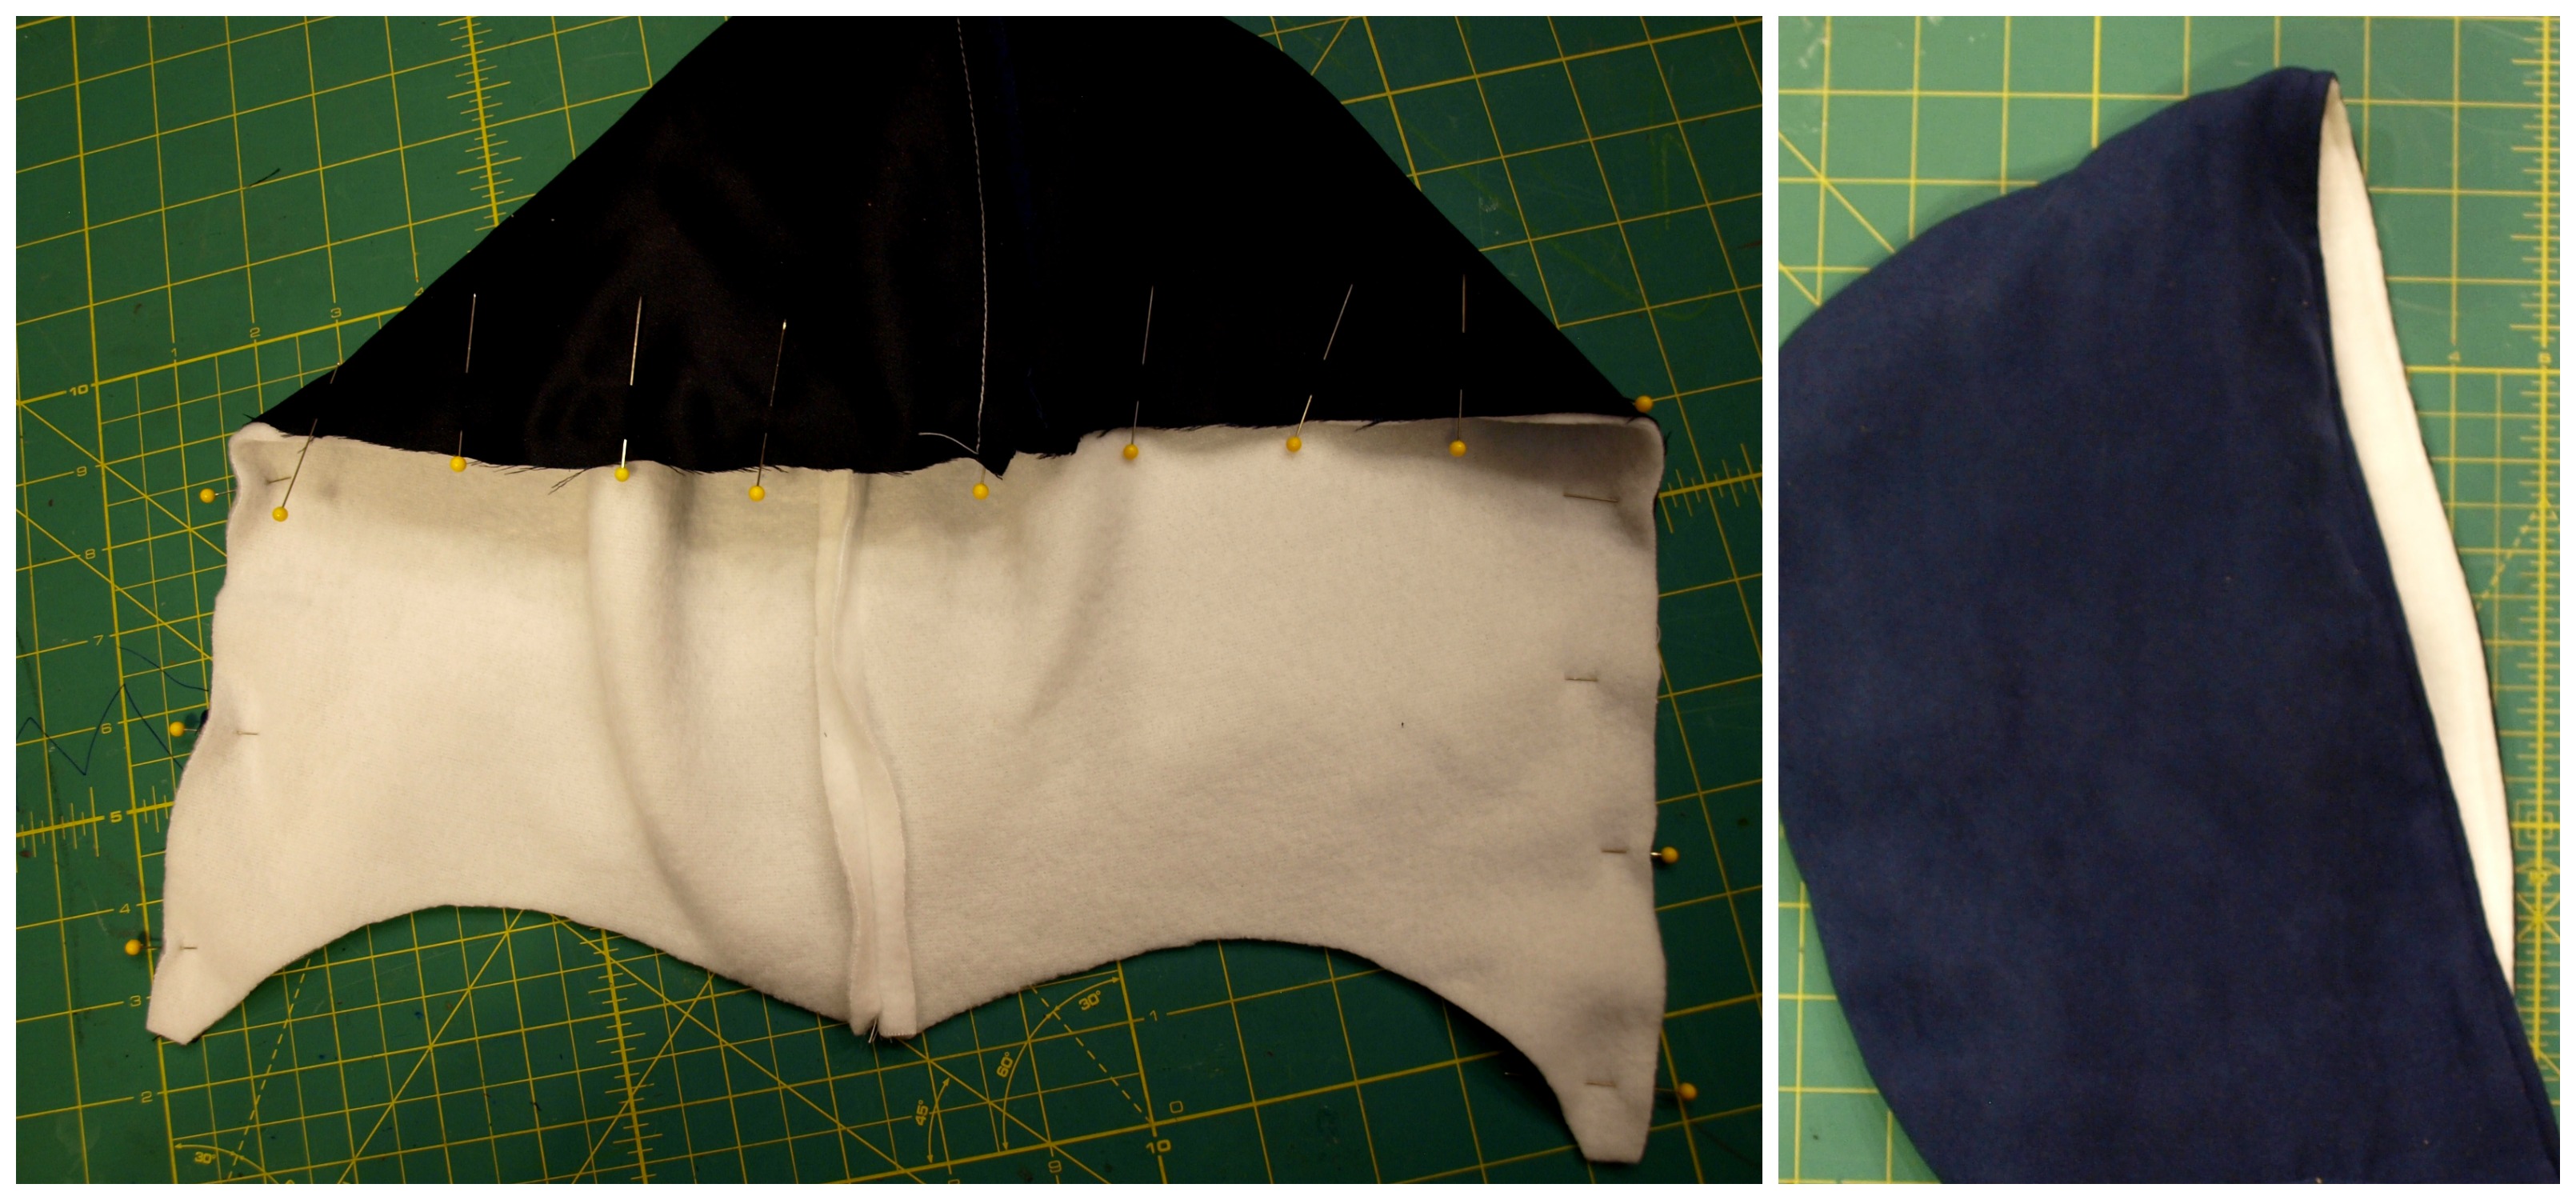
Sew up the skirt (and peplum) pieces on the sides and hem as per the tutorial. You’ll have this:

???????????????????????????????

FOR DOUBLE LAYER: Now layer the skirts and pin the raw edges together lining up side seams with wrong side to right side.

??????????????????????????????? ???????????????????????????????

For BOTH versions: Baste gathering lines at the top of your skirt per the tutorial, pull the strings to make it gather and attach as instructed.  YEP!  It’s just that easy!

???????????????????????????????

Now your little sweetheart is ready to spread some love ❤

Cordelia Dress6
Thank you so much for your purchase of the Cordelia pattern.  We LOVE our customers and enjoy bringing you these types of tutorials.  Happy Valentine’s Day!

-Crystal-

Tutorial: The Sophie Hood

Good Monday to you!  I’m super excited to bring you My Little Plumcake’s first ever free blog tutorial.  Once we decided that The Sophie was going to be the spotlighted pattern for January, it didn’t take us long to figure out which tutorial we wanted to do.  Michelle has been aware of the desire for a hood for this pattern and we’ve decided to give the people what they want.  This is a really simple add-on that we know you’re going to love.

Image

Let’s jump right in!

The supplies you need to make a basic Sophie are listed in the pattern.  The only additional things you’ll need are:

  • Fabric for the hood
  • An article of clothing you already have with a hood you like the fit & shape of.

For fabric, refer to the pattern for the base amount of fabric for the size you’re making.  This amount is based on using the collar piece, but since we’re making a hood, it’s going to be slightly different.  The hood piece I made for the 5T is 15” at the tallest point and 9” at the widest.  You’ll need enough fabric to cut 2 of each (main, lining, and fusible fleece should you use it), so make sure you have at least ½ yard extra reserved for the hood after cutting your main jacket pieces.

You’re going to follow the instructions as written right up until the collar portion.  At this point you’ll have your main jacket panels and your lining panels sewn together into two pieces.  Now it’s time to draft and construct the hood.

We have provided a free size 5T pattern download which was made using the pattern I hand drafted for this tutorial…just digitized and professional.  If this is the size you’re making, your life just got easier. Here’s the Sophie Hood Digital pattern for the 5T! If you’re making a different size, no worries; I’m gonna show you how to make your own pattern. Let’s go!

Take your main jacket piece and fold it in half along the neckline.  Lay this down on a piece of paper to trace the curve.  I mark the side with the fold so I don’t forget which side is which. The fold side is the BACK of your hood.

Image

Now flip this curve upside down and start adding extra blank pages upward to expand your canvas.  I forgot to take a picture of this so….

Image

Grab your hood that you love.  Fold it in half and get ready to trace.  You will be tracing all around your hood making sure to have the folded edge placed on the side you have marked.  The seam should lay on the line you drew.  You’ll notice on my picture that I made my hood taller.  The reason I did this is for aesthetics alone.  I know this hood fits my daughter well (from The Canaan blazer pattern), but I wanted something that had a softer look with more of a draped hood.  The more you extend the top, the more of a drape you’ll get.

Image

After you trace the pattern add your seam allowance all around with the exception of the bottom, where the hood will attach to the neckline.  The bottom edge points should be squared, NOT pointed. Now cut the pattern out.

Image

You will need to cut:

  • 2 main
  • 2 lining
  • 2 fusible fleece (optional)

If you are using fusible fleece, apply it to your main fabric per manufacturer’s instructions before moving on.  I used normal fleece as my lining fabric, so I only cut 2 main & 2 lining…just to clear that up.

Put your main hood pieces right sides together, pin and sew starting from the top front and going all around the back. Do not sew the front closed!  Clip your curves and turn the LINING piece right side out.

Image

Place your lining inside of your main hood RST and sew the front closed, starting from the bottom edge of one side and continuing to the bottom edge of the other end.  Do not sew the bottom closed.  Now turn right side out and top stitch the front of the hood.

Image

You may notice that the bottom of the hood doesn’t have a straight edge.  I did this intentionally.  By having the middle dip, you’re avoiding an awkward pulling of the neckline in the back.  This rests much more naturally than a straight edge, in my opinion.  If you don’t like it, too bad.  It’s my tutorial, darn it! Hahaha!  Just kidding.  You can just change the original pattern to level out at the fold side.  Here’s what it looks like MY way:

Image

Baste the bottom edge closed and cut off any overlapping seam allowances on the ends.

Image

Fold the main jacket piece in half and mark the middle point of the neckline. With right sides together pin the base of the hood to the neckline of the main jacket, starting at the center by lining up the seam of the hood with the mid-point if the jacket neckline.   Baste this in place using a ¼” SA.

Image

Now continue sewing as instructed in the Sophie tutorial.   The only deviation from the original tutorial from this point on is that you’ll need to clip the curves after you’ve sewn the hood on between the lining and the main.  This will make for a cleaner seam finish.

Image

Image

That’s it!  I hope you enjoyed the heck out of this tutorial and thank you so much for your purchase of the Sophie.  Feel free to comment below with questions or outpourings of love and admiration 😉  And we love to see pictures of your finished projects!  You can share them via linking in the comments or uploading to either our FB fan page or our FB group page.

Happy Sewing,

-Crystal-

New Year, New Blog- Happy 2014!

Happy 2014 and welcome to the all-new My Little Plumcake blog!

Image

Most people make resolutions and while we typically like to swim away from the school, we’ve decided that this year we’re on board with the resolution thing.  2014 is going to bring about growth.  We are determined to work harder and better to bring you a fantastic sewing experience.  Our blog is just the jumping off point for all of the new & exciting things that we’ve been dreaming up.   We will keep posting to our Facebook fan page, Facebook group page,  Instagram and Pinterest (follow us!), but we also have some really awesome NEW stuff on our list:

  • Giveaways
  • Tutorials
  • Recipes (sewing snacks anyone?)
  • Sew-Alongs
  • Patterns of the month
  • New pattern testing opportunities for you
  • And our MOST EXCITING upcoming event….the Spring 2014 pattern collection!

The Spring 2014 pattern collection will include patterns for both girls and boys and will, of course, feature Michelle’s eye for detail and style.  We could not be more excited about it!  Keep an eye out for a tester call in the near future.  We’ll be looking for experienced testers with fresh eyes and a willingness to help My Little Plumcake deliver a quality product for our extremely valued customers.  That’s all the detail we can reveal right now, but we hope it was enough to get you pumped up about it!

One of the really fun things we’ve decided to do in 2014, is feature one of our patterns every month and offer a discount for that pattern.    For January 2014, we’ve chosen to feature….. :::DRUMROLL:::

Image

 The Sophie Jacket!

 This jacket is awesome for finishing out the winter and welcoming the chill of early spring.  It is a belted cape that creates the warmth and visual illusion of a sleeve by using a belt or a ribbon to tie it closed.  It’s fully lined and perfect for beginners.  There’s a faux button placket that gives the look of buttons with the ease of snaps!  As with all My Little Plumcake patterns, the Sophie is an instant PDF download- NO WAITING.     Michelle has JUST re-digitized this pattern as part of her plan to make MLPC the best it can be!  Snatch it up right now for 25% off.

Image

We really hope that this blog will give you a great sewing experience.  We aim to help make you a more Savvy Seamstress with a little Plumcake spice and everything nice.

Happy New Year,

Michelle & Crystal

%d bloggers like this: